Converting public lighting is no longer just a matter of attaching a panel above each lamp. In 2026, municipalities must examine energy demand, pole condition, night-time illumination, battery performance, and maintenance access. This guide explains how to convert traditional street lights to solar power through a practical, engineering-led process.
Amory Lovins, a respected energy-systems expert, has stated, “Efficiency is the cheapest, cleanest, fastest way to meet our energy needs.” That principle matters here. A poorly aimed luminaire can waste energy, even with an oversized solar array. A reliable conversion begins with a site survey. Measure existing wattage, operating hours, shadow patterns, traffic levels, and local winter conditions. Then select an efficient LED fixture, photovoltaic panel, charge controller, battery, and mounting structure as one system.
Small details matter.
For example, a tree can shade a panel during the afternoon, reducing stored energy before nightfall. Dust, snow, salt air, and high temperatures can also shorten service life. Designers should allow suitable autonomy for cloudy weather, while avoiding unnecessary battery capacity and cost. Existing poles may need structural inspection before carrying new equipment. Photometric testing should confirm that roads, crossings, and sidewalks remain adequately illuminated without creating glare.
The process is not perfectly predictable. Weather data can be incomplete, and older wiring records may be unreliable. That uncertainty deserves honest attention, not optimistic assumptions. This article outlines practical conversion steps, common design mistakes, safety considerations, and maintenance lessons for building dependable solar street lighting systems.
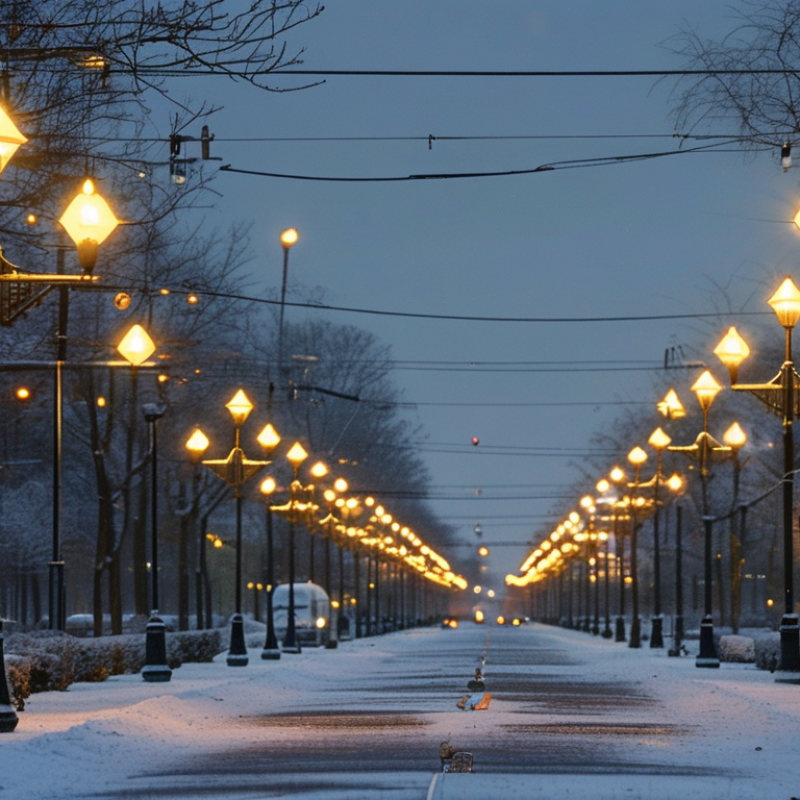
How to Convert Street Lights to Solar Power in 2026?
Understanding street light solar conversion in 2026 begins with a site audit, not a panel purchase. Measure nighttime illuminance, pole spacing, shading, traffic patterns, and winter sunlight. Check the existing fixture’s wattage and operating hours. A 60-watt LED running 12 hours nightly uses about 263 kWh yearly. Solar sizing must cover that load, charging losses, cloudy days, and battery aging.
The International Energy Agency Photovoltaic Power Systems Programme reported global photovoltaic capacity above 1.6 terawatts by the end of 2023. The International Renewable Energy Agency recorded roughly 1.87 terawatts by the end of 2024. These figures show stronger supply, but they do not guarantee a suitable street-light design. Local weather still controls performance. A shaded pole can undermine an otherwise efficient system.
Use an integrated solar fixture or retrofit the luminaire, controller, panel, and battery separately. Lithium iron phosphate batteries can support frequent cycling, but thermal conditions and replacement access deserve attention. Set dimming schedules around pedestrian activity. Keep emergency brightness requirements unchanged. Poor battery sizing remains a common failure.
Designers should verify lighting levels after installation with a calibrated meter. Review data through at least one rainy season. This step is often skipped. That is a mistake. Solar conversion can reduce grid dependence and trenching, yet it may increase pole-top weight, maintenance difficulty, and upfront costs. A technically elegant system can still disappoint when cleaning, vandalism protection, or battery replacement is ignored.
A reliable conversion begins with a field inspection, not a catalog. Record each pole’s height, material, foundation condition, lamp wattage, and operating hours. Check corrosion, loose wiring, damaged brackets, and underground cable routes. A weak pole can undermine an otherwise efficient solar design.
Measure illumination after dark at road edges, crossings, and pedestrian areas. Compare readings with the project’s local lighting requirements. Review twelve months of solar irradiation data from a trusted meteorological source. Then inspect nearby trees, buildings, signs, and seasonal shadows. One overlooked shadow can reduce winter energy production sharply.
Calculate daily energy demand from real operating records when possible. Include controller losses, battery charging losses, cloudy-day reserves, and temperature effects. Battery capacity should reflect the required autonomy, not an optimistic summer average. I have seen designs fail because traffic patterns changed and lights stayed on longer. That mistake deserves attention.
A practical assessment also examines maintenance access, theft resistance, drainage, and cleaning schedules. Dusty panels lose output, while sealed batteries may still need periodic inspection. Use conservative assumptions and document every measurement. Some sites will not suit solar conversion. Recognizing that early is professional judgment, not failure.
Converting street lights to solar power in 2026 starts with matching every component to the road, not just the lamp. Measure nighttime traffic, pole height, shading, and winter sunlight. A solar panel should produce enough energy for daily lighting and battery losses. Oversizing is safer, but it raises wind loading and installation costs. I once underestimated tree shade near a parking lane. The panel looked clear at noon, yet evening shadows reduced charging.
Choose a deep-cycle battery with enough capacity for several cloudy nights. Lithium iron phosphate batteries usually offer long cycle life and stable performance, while sealed lead-acid units can suit smaller budgets. Check usable capacity, temperature limits, enclosure ventilation, and replacement access. Do not size the battery from its label alone. Reserve capacity matters during long winter storms.
The charge controller should match panel voltage, battery chemistry, and expected current. An MPPT controller can improve harvest during cold, low-light mornings. Select an LED fixture by road brightness, beam pattern, color temperature, and efficiency. A narrow beam may illuminate asphalt well but leave sidewalks dark. Look for weather-resistant housings, surge protection, and dependable thermal management. Keep wiring short and protected from rodents. Test one pole before converting an entire street. Field results may challenge the spreadsheet. Review them honestly.
Typical daily energy sizing for one autonomous LED street light operating for 12 hours. The example assumes a 40 W LED fixture, a 95% efficient controller, a 20% battery charging margin, and approximately 5 peak-sun-hours per day.
A 40 W LED fixture uses about 0.48 kWh per night. After controller losses and charging overhead, approximately 0.63 kWh of solar energy should be collected daily. With five peak-sun-hours, this indicates a solar panel size of about 126 W; a practical design would commonly select a 150–200 W panel and a LiFePO₄ battery with roughly 0.8–1.2 kWh of nominal storage for reserve capacity.
Planning the conversion starts with a site survey, not a panel purchase. Record sunlight, pole height, road width, night traffic, and nearby shadows. A winter inspection is valuable because trees can block low-angle sunlight. Measure existing illumination with a calibrated meter. This prevents replacing a bright lamp with an unsafe dim one. Review local electrical codes, road-lighting standards, and utility requirements before design work begins. A qualified engineer should confirm wind loading, foundation strength, cable protection, and emergency access. Battery capacity must match the longest expected cloudy period. Oversizing the battery raises costs and increases replacement waste.
Installation should follow a controlled sequence. Isolate the existing circuit and inspect each pole for corrosion. Do not mount heavy equipment on weakened steel. Install the solar module at a suitable tilt, away from shade and maintenance obstacles. Secure the battery enclosure against water, heat, and unauthorized access. Use correctly rated cables, fuses, earthing, and surge protection. Keep connectors sealed. Small leaks become expensive faults.
Commission every light after sunset. Check brightness, motion settings, charging behavior, and automatic dimming. Compare results with the original lighting survey. In one field project, the planned panel angle looked correct, yet a nearby sign reduced afternoon charging. The design needed revision. That mistake was useful. Schedule monthly visual inspections and seasonal battery checks. Clean dust from panels, record voltage trends, and replace damaged seals promptly. Keep the maintenance record with measured readings, not guesses.
How to Convert Street Lights to Solar Power in 2026?
Converting street lights to solar power requires more than replacing grid wiring with panels. Start by measuring nighttime illumination at several points beneath each pole. Record results during dry and cloudy conditions. Compare them with local lighting requirements. Battery autonomy should cover several low-sun days, not just one clear night. Check panel angles, pole strength, cable protection, and enclosure sealing before installation. A qualified electrician should verify isolation, grounding, and overcurrent protection. Small oversights can create serious hazards.
Tips: Test one light through a full operating cycle before expanding the project. Inspect battery voltage at dusk, midnight, and dawn. Watch for unexpected dimming. Keep photographs and readings in a maintenance log. Use lockable enclosures and clear warning labels. Do not assume a higher-capacity battery always improves reliability; poor charging control can shorten its life.
Maintenance planning should begin during conversion. Clean panels after dust storms, inspect fasteners after strong winds, and check for water inside junction boxes. Look for cracked insulation, loose terminals, corrosion, and unusual battery swelling. Replace damaged parts promptly. Software alerts can help, but physical inspections remain necessary. Early testing may reveal uneven lighting or faster battery drain than predicted. That is not failure. It is useful evidence. Revise the design, then retest under similar conditions. Weather patterns also change, so annual performance reviews should update battery and panel assumptions.
| Category | Performance or Safety Dimension | Typical 2026 Planning Value | Recommended Test or Acceptance Check | Maintenance Action |
|---|---|---|---|---|
| Lighting | LED luminaire power | 30–150 W, selected from the required road classification and mounting height | Measure input power with a calibrated power meter; record wattage, voltage, current, and power factor. | Check for abnormal power increase, flicker, loose terminals, and damaged optical covers every 6–12 months. |
| Lighting | LED efficacy | Approximately 100–180 lumens per watt for modern outdoor LED systems, depending on operating temperature and optics | Verify delivered illuminance with a calibrated lux meter and compare it with the approved lighting design. | Clean the optical surface and inspect for yellowing, condensation, or physical damage. |
| Solar Generation | Photovoltaic array sizing | Size from local solar irradiation, system losses, winter conditions, and daily lighting energy; a common design efficiency allowance is 70–85% of rated energy. | Confirm panel orientation, tilt, shading, open-circuit voltage, short-circuit current, and polarity before connection. | Remove dust, leaves, and bird deposits; inspect fasteners and cable glands at least twice per year. |
| Energy Storage | Battery autonomy | Typically 2–3 consecutive nights without adequate solar charging, adjusted for local weather risk | Run a controlled night-time discharge test and verify the low-voltage protection threshold. | Review state of charge, temperature history, alarms, and capacity trends during scheduled inspections. |
| Energy Storage | Battery usable depth of discharge | Approximately 70–90% for lithium-based systems when permitted by the battery management system; follow the selected battery's specification. | Verify charge, discharge, over-temperature, and over-current protections through controller diagnostics. | Replace the battery when measured capacity falls below the project’s approved threshold, commonly 70–80% of rated capacity. |
| Controls | Dusk-to-dawn operation | Photocell or astronomical control with programmable dimming, such as full output during peak traffic and reduced output during low traffic. | Simulate darkness and daylight, then record switch-on time, switch-off time, dimming levels, and fault reporting. | Check sensor alignment, time settings, firmware, and communications during each service visit. |
| Illumination | Roadway illuminance and uniformity | Use the values required by the applicable road-lighting class; project targets commonly specify average illuminance and minimum-to-average uniformity rather than a single universal value. | Measure a consistent grid of points after sunset and compare average, minimum, maximum, and uniformity results with the approved design. | Recheck pole tilt, luminaire orientation, lens cleanliness, and tree growth if dark spots appear. |
| Environmental Protection | Ingress protection | IP65 or higher is commonly selected for outdoor luminaires and enclosures; the required rating depends on exposure and local conditions. | Inspect seals, gaskets, cable glands, drain paths, and enclosure covers for water or dust entry. | Replace cracked seals and tighten or renew cable glands when signs of moisture are found. |
| Electrical Safety | Isolation, grounding, and surge protection | Provide DC isolation, over-current protection, protective earthing where required, and surge protection suitable for the installation and local code. | Perform polarity, continuity, insulation, grounding, and surge-protection checks before energizing the system. | Inspect grounding conductors, bonding points, fuses, isolators, and surge devices annually and after lightning events. |
| Mechanical Safety | Pole, panel, and wind-load condition | The structure must be designed for the site’s wind speed, panel area, mounting height, and foundation conditions. | Check foundation movement, corrosion, welds, bolts, panel brackets, cable routing, and pole verticality. | Retighten approved fasteners, remove corrosion, and repair protective coatings according to the inspection report. |
| Thermal Performance | Operating temperature | Use equipment rated for the site’s minimum and maximum ambient temperatures; battery temperature limits are typically more restrictive than LED limits. | Record battery, controller, and luminaire temperatures under normal operation and during high-load periods. | Maintain ventilation, prevent direct heat accumulation, and investigate repeated thermal alarms. |
| Reliability | Nightly availability | Set a project target, commonly at least 95% of scheduled operating hours over the monitoring period. | Use controller logs or remote monitoring to calculate operating hours, outages, dimming events, and energy shortfalls. | Prioritize repeated faults, battery undercharging, shading, water ingress, and communication failures. |
| Maintenance Planning | Recommended service cycle | Visual inspection every 6 months; electrical and performance testing annually; detailed structural inspection every 2–3 years or after severe weather. | Keep dated records of lux readings, battery capacity, panel output, alarms, repairs, and component replacement. | Use trend data to schedule cleaning, battery replacement, firmware updates, and corrective work before failures occur. |
Planning note: Values shown are typical engineering ranges or project targets, not universal requirements. Final designs and acceptance criteria should be verified against the applicable road-lighting, electrical, structural, battery, and environmental regulations for the installation site.
: Inspect the pole, foundation, wiring, fixture, and underground cables. Measure pole spacing, lamp wattage, operating hours, and nighttime illumination. Look for corrosion, loose brackets, weak foundations, and damaged cables. Measure after dark.
A 60-watt light running 12 hours nightly uses about 263 kilowatt-hours yearly. Add energy for controller losses, battery charging, cloudy weather, and battery aging. Use real operating records when available. Summer estimates can mislead.
Review twelve months of local solar data before choosing panel size. Check trees, buildings, signs, and seasonal shadows near every pole. A shadow covering one panel section can reduce winter production sharply. Winter changes everything.
An integrated solar fixture may simplify installation and reduce wiring work. A separate panel, controller, battery, and luminaire can offer easier replacement. The better choice depends on access, weight, cost, and existing equipment. There is no universal answer.
Size the battery for required nighttime autonomy, not an optimistic summer average. Consider cloudy days, temperature changes, charging losses, and future battery aging. Frequent cycling may suit lithium iron phosphate batteries, but thermal conditions still matter. Poor sizing remains common.
Yes, brightness can follow pedestrian activity and traffic patterns. Keep emergency brightness requirements unchanged. Use higher output near crossings and active areas when safety requires it. A quiet road is not always empty.
Check lighting levels at road edges, crossings, and pedestrian areas. Use a calibrated meter and compare readings with local project requirements. Review performance through at least one rainy season. This step is often skipped.
Plan access for panel cleaning, battery inspection, and fixture replacement. Dust can reduce panel output, while pole-top weight can complicate servicing. Protect equipment from vandalism, water accumulation, and accidental damage. Maintenance is part of design.
Solar may be unsuitable where heavy shading, weak poles, or poor winter sunlight exist. Sites with demanding brightness and long operating hours may require larger equipment. Some locations need grid power for dependable performance. Recognizing limits is professional judgment.
This guide explains how to convert traditional street lights to solar power in 2026 through a practical, step-by-step approach. It begins by assessing the existing poles, wiring, lighting requirements, daily operating hours, local sunlight levels, and available installation space. This evaluation helps determine whether the current infrastructure can be reused and how much solar energy the system must produce throughout the year.
The article then covers the selection of suitable solar panels, batteries, charge controllers, and energy-efficient LED fixtures. It also describes how to plan the conversion, install each component securely, and connect the system for reliable nighttime operation. After installation, performance testing should confirm illumination, battery charging, weather resistance, and electrical safety. Regular inspections, cleaning, battery checks, and timely replacement of worn components are essential for long-term efficiency. With careful planning and responsible maintenance, how to convert traditional street lights to solar power becomes a manageable process that can reduce energy consumption and support more sustainable public lighting.
