“How to wire multiple outdoor flood lights in series” sounds straightforward, but the phrase can describe two different things. In household lighting, fixtures are normally connected in parallel, so each receives the supply voltage and can operate reliably. A true series connection divides voltage between lights and may cause them to behave unpredictably. The distinction matters.
Electrical educator Mike Holt emphasizes understanding a circuit before connecting its loads. Paraphrased for this project: “Know the circuit before you connect the lights.” This is a guiding principle, not a verbatim quotation. It also points to a common mistake: treating “series” as a casual name for several lights linked along one cable run.
A safe plan starts with the fixture instructions, the circuit rating, and the cable type approved for the installation. Outdoor connections need weather-rated boxes, suitable fittings, and protection against moisture. A damp junction box can turn a tidy-looking installation into a serious hazard. Take care here.
This guide explains what people usually mean by wiring multiple flood lights in series, how parallel wiring differs, and what to check before work begins. It does not replace local electrical requirements or a qualified electrician’s judgment. If the circuit layout is uncertain, stop and ask a licensed professional. That pause is worth it.
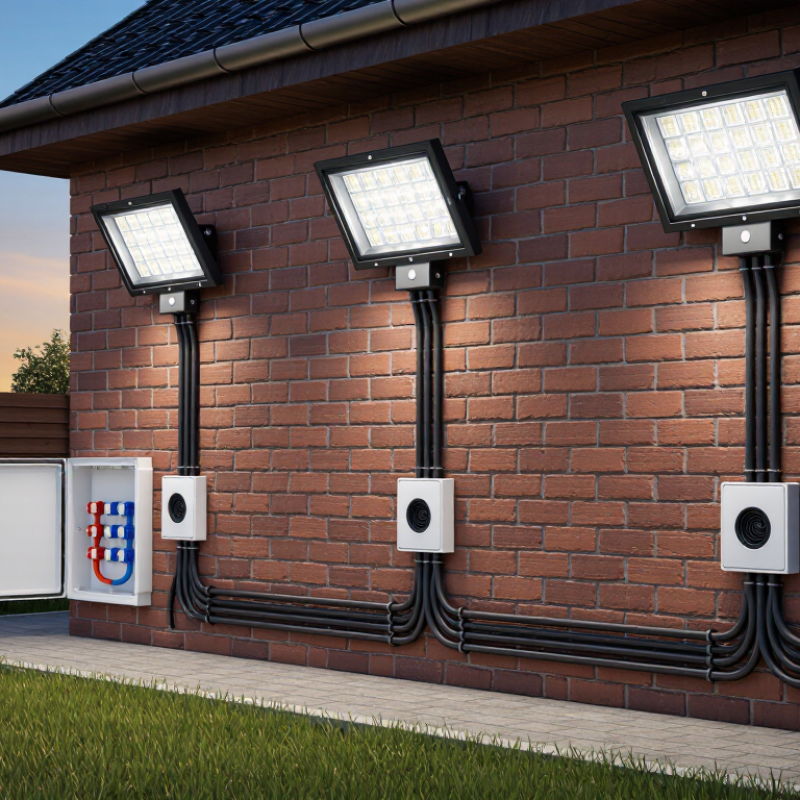
Series wiring places flood lights on one continuous electrical path. Current passes through each fixture in turn. That is rarely suitable for household outdoor lighting. In a series circuit, the supply voltage is shared across the connected lights, and one failed fixture can interrupt the whole run.
Most outdoor flood lights are designed for parallel circuits. Each fixture receives the circuit’s rated voltage and can operate independently. A “daisy-chain” cable route may still connect fixtures in parallel; the cable’s physical path does not determine the circuit type. The electrical connections do. That distinction matters.
For multiple lights, confirm the fixtures’ voltage and total load, and make sure the branch circuit and wiring are properly rated. Use outdoor-rated boxes, fittings, and cable, with secure grounding and weather protection. Turn off power and verify it is off before any work. Even a simple layout can hide a tricky junction. If you are unsure about the wiring or local requirements, ask a qualified electrician to assess the installation.
Before planning multiple outdoor flood lights, check the locally adopted electrical code and the circuit’s existing loads. Ordinary line-voltage fixtures are generally connected in parallel, not electrically in series; each fixture then receives the supply voltage it is rated for. Outdoor equipment must be suitable for its exposure, and required protection can vary by location. Details matter.
NFPA’s Home Fires Involving Electrical Distribution and Lighting Equipment report estimated an average of 32,620 U.S. home structure fires annually involving this equipment during 2015–2019. That figure covers many causes, not outdoor flood lights alone, but it reinforces the need for sound connections and correctly rated components. Check each fixture label for voltage, wattage, and wet-location suitability. A damp porch and an exposed yard are not the same environment.
Add the fixtures’ wattages, then divide by the circuit voltage to estimate their combined current; include other loads already on that circuit. For continuous loads, the 2023 National Electrical Code generally requires branch-circuit conductors and overcurrent protection sized for 125% of the load. Local adoption and exceptions matter, so do not treat that calculation as universal permission to add fixtures. I would verify the breaker, wiring, and installation method before work begins. Small details can change the answer.
Outdoor floodlights are normally wired in parallel, not in series. Parallel wiring lets each fixture receive its rated voltage and operate independently. Before opening a junction box, switch off the correct breaker. A wall switch alone is not enough. Verify the circuit is de-energized with a suitable voltage tester, checking the tester on a known live source before and after use. If the readings are unclear, stop and get qualified help.
Tips: Use outdoor-rated, weatherproof boxes and cable connectors that match the cable type. Keep seals clean, tighten fittings, and leave no copper exposed. A small detail matters: water can track along a cable into a box.
Prepare each connection where it will stay dry during installation. Follow the fixture instructions and local electrical requirements, since permitted wiring methods can vary. Secure cables with strain relief, and preserve any gasket or cover seal. Do not bury a splice or leave an open box exposed to rain. I would also pause to inspect old insulation; it can look sound while cracking when bent. If the wiring or grounding is uncertain, have an electrician assess it before restoring power.
The phrase “in series” often causes confusion with outdoor lighting. In a typical home circuit, flood lights are connected in parallel, not true series. Each fixture receives its rated voltage, and one failed lamp does not usually shut off the others. That matters on a long driveway, where a dark fixture can otherwise leave a large area unlit.
Plan the circuit around the fixture instructions, the circuit rating, and local electrical code. Outdoor lights generally need weather-rated boxes and fittings, suitable cable or conduit, grounding, and protection such as GFCI where required. The exact requirements depend on the location and installation. Check the total load, including existing lights on the same circuit; several high-wattage fixtures can exceed what the circuit should carry. Keep connections inside approved enclosures, not loose behind a fixture. Small details matter here.
Before work begins, turn off the correct breaker and verify the circuit is de-energized with an appropriate tester. Do not rely on a switch alone. Follow the wiring diagram supplied with each fixture, and have a licensed electrician assess unfamiliar wiring, buried runs, or a panel connection. I would not assume an older outdoor circuit is properly grounded just because its lights still work. That assumption is easy to make, and hard to justify.
After wiring, keep the circuit de-energized while inspecting every splice. Check that conductors are fully seated, connectors match the wire type and size, and no copper is exposed outside the terminals. Restore power only when covers are secured and the area is dry. Test each floodlight from a safe position; confirm steady illumination, then switch the circuit off and on once more. If one lamp stays dark, isolate power before checking its connections. A true series circuit can go dark when one lamp fails, while household floodlights are commonly wired in parallel. Verify the intended circuit design rather than assuming.
Sealing matters. Use an outdoor-rated junction box and fittings, keep gaskets clean, and tighten covers evenly so water cannot track through a tilted lid. IEC 60529 classifies IP65 enclosures as dust-tight and protected against water jets; IP66 offers protection against powerful water jets. These ratings help you choose suitable equipment, but they do not excuse poor installation. NFPA’s report on U.S. home structure fires involving electrical distribution and lighting equipment estimated about 34,000 such fires annually during 2015–2019. That figure covers many causes, not just outdoor connections, yet it underlines why loose or damp splices deserve attention. I still recheck the seal after the first rain; a neat-looking bead of caulk can hide a misplaced gasket. Don’t block drainage openings.
| Stage | What to Check | Expected Result | Safety and Weather Protection |
|---|---|---|---|
| Wiring arrangement | Confirm the fixture and circuit design before installation. Typical residential mains-voltage flood lights are connected in parallel, not in series. | Each light receives its rated supply voltage and can operate independently. Follow the fixture instructions and applicable local electrical codes. | Do not connect mains-voltage fixtures in series unless the equipment is specifically designed for that arrangement. Have fixed wiring installed or checked by a qualified electrician. |
| Before testing | Check that the supply is switched off while connections are inspected. Look for damaged insulation, loose terminals, incorrect cable entries, or exposed conductors. | Connections are secure, correctly enclosed, and free of visible damage before power is restored. | Verify isolation with an appropriate tester. Do not touch conductors or open a live fixture. |
| Initial power-on | Restore power using the circuit breaker or switch, then observe each light from a safe position. | All fixtures illuminate as intended, without flickering, unexpected dimming, buzzing, or repeated breaker trips. | If a breaker trips, a fixture behaves abnormally, or there is a burning smell, switch off the circuit and contact a qualified electrician. |
| Individual operation | Test each fixture’s switch, sensor, or control separately, where fitted. | Each light responds to its intended control. Sensor timing and detection range match the product settings and installation location. | Keep clear of moving ladders and elevated fixtures while testing. Follow the product instructions for sensor adjustment. |
| Temperature and operation | After the lights have run for the period specified by the manufacturer, check for abnormal heat, discoloration, or unusual noise. | Fixtures operate normally within their rated conditions. Some warmth may be normal; excessive heat or odor is not. | Do not touch hot components. Switch off power before investigating any abnormal condition. |
| Outdoor connection sealing | Check that covers, gaskets, cable glands, and entry points are correctly fitted and compatible with the fixture’s outdoor rating. | Enclosures are closed as instructed, and cables enter through the intended sealed openings. | Use only manufacturer-approved sealing parts and methods. Do not block drainage or ventilation features, and do not assume sealant alone makes a connection weatherproof. |
| Final inspection | Inspect the finished installation for secure mounting, intact covers, protected cable routes, and no exposed wiring. | Fixtures are stable, enclosures are closed, and the installation is ready for normal outdoor use. | Use equipment with an outdoor rating suitable for its location. Follow local requirements for grounding, residual-current protection, and inspection. |
No. Typical line-voltage fixtures connect in parallel, so each receives its rated supply voltage. Verify the intended circuit design.
Add the fixtures’ wattages and divide by circuit voltage to estimate current. Include other loads on that circuit. The calculation is only a starting point.
Read its voltage and wattage labels, and confirm it suits the location. An exposed yard faces more weather than a covered porch.
Not necessarily. Choose equipment rated for its actual exposure, and check locally adopted requirements. Small distinctions matter.
Some adopted electrical codes require continuous loads to be calculated at 125% when sizing conductors and overcurrent protection. It is not automatic permission to add fixtures.
Keep power off while checking that conductors are seated, connectors match, and no bare copper is exposed. Secure covers before restoring power. The area should be dry.
Test from a safe position and look for steady illumination. If one stays dark, switch off power before inspection. I would not assume the lamp itself is the only cause.
Use an outdoor-rated box and fittings. Keep gaskets clean, tighten covers evenly, and do not block drainage openings. I used to trust a neat caulk bead, but it can hide a misplaced gasket. Recheck seals after rain.
Although the phrase how to wire multiple outdoor flood lights in series is common, most household flood lights are designed to connect in parallel so each fixture receives the correct voltage and can operate reliably. Before planning the installation, check the fixtures’ ratings, the circuit’s available capacity, and applicable local electrical codes. If the wiring arrangement or load is unclear, consult a qualified electrician rather than assuming that a series connection is suitable.
Turn off power at the breaker and verify the circuit is de-energized before any work begins. Use outdoor-rated, weatherproof wiring methods and junction boxes, and make connections only as permitted by the fixture instructions and local requirements. After installation, restore power to test each light, then inspect and seal outdoor connections against moisture. Careful planning, proper protection, and a final check help create a safe, dependable lighting circuit.
